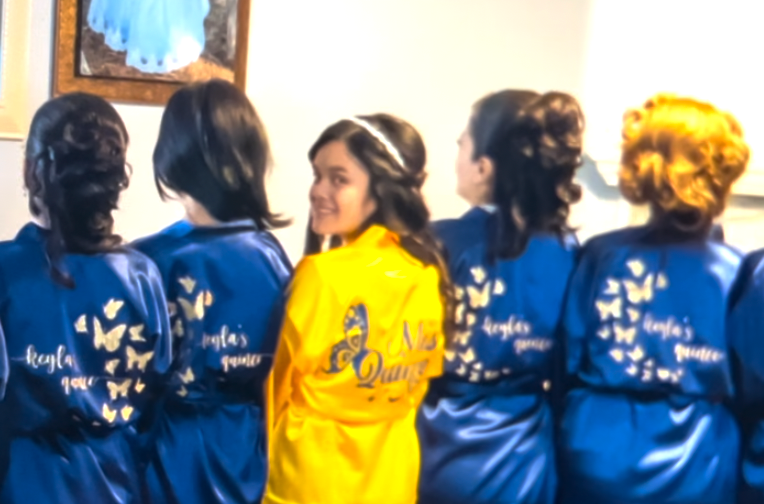
DIY Quince Robes
I remember years ago, when I had my fifteen I wanted everything to be custom! If only we would’ve know about sublimation and cutting machines haha. This year was actually my baby sisters quince! Because she is the baby of the family we made sure to go allllll out!
We decided to customize robes!

I made Keyla a custom yellow robe to match her quince dress. I wanted to surprise every one who was going to be getting ready with us so I customized another 10 robes! Look at how cute we all looked! Haha can’t get over that tia pose. Keyla’s theme was Beauty and the Beast which is why I made our robes Navy blue.

Let me walk you through how to make your own custom robe!
Here are all the supplies you will need.
- A vinyl cutting machine
Here are the ones that I have
- Robe blanks
These are the ones I used and here are a few other budget friendly options
- Heat transfer vinyl.
I used glitter HTV because I really like the look. This is the HTV I used.
Glitter gold and Glitter navy blue.
- A heat press. I used both my Mint press and my Cricut Press to get through the project faster.
Now lets get into actually making the robe!
Step 1 Create your design in whatever software you use with your cutting machine

Step 2 Weed the design, make sure to get out all HTV pieces you don’t need

Step 3 Place your weeded HTV design on to the robe
Step 4 Preheat your heat press to 325 F, once its ready press your robe for about 10-15 seconds.

Step 4 Remove the top layer and your robes are ready!

Youtube Video

1 comment
Hi! I have the following questions; What’s the size of the crown + name in the front? And back?
I’ll appreciate your response.
Thank you,
Yilian